

Dick Hussey's Tech Corner
Allante Tail Light Emblems
Among the many plastic parts on our Allantes that are showing the signs of age are the tail light emblems. Typical problems are missing letters (A), decomposing chrome plating (B), and aging/fading gold plating (C). Fortunately, now there are high quality replacements available that have been designed to facilitate replacement.
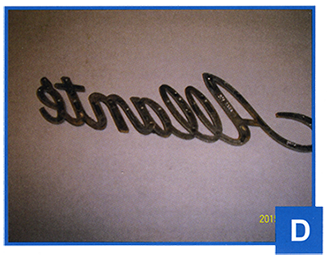
I view one of the shortcomings of the original emblems was the method of attachment. On the back of the original emblems, there are numerous small raised pads (D).
Emblem adhesive is applied to each of these pads. It is fast drying, but it tends to make strings (think airplane glue) and it permanently etches the surface of the outer tail light lens to which it is applied. The new replacement emblems we have are the same size as the originals (E), but have double sided tape on the back, which covers the entire outline of the emblem. Two issues are important here. The rough spots from the glue cannot be smoothed out, but this is not an issue. Since the new
emblems are the same size, they get applied over the original glue marks, completely covering them. And there is a positive side of this- the glue marks provide a location target for the new emblem.
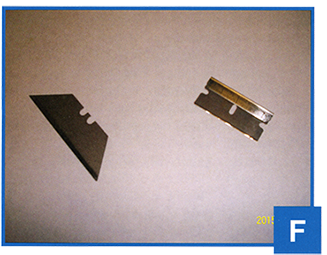
When replacing an emblem, the first step is to remove the old emblem. Sometimes they just fall off. Other times, this can be more of a challenge. We have found the easiest way to get them off is with a razor blade, either a safety razor blade or a blade from a retractable knife (F). The blade not only cuts but also acts like a wedge as you slide it between the emblem and the outside surface of the tail light lens. Find a spot where you can get the blade between the emblem and the lens (G), then rotate it back and forth slightly, while at the same time pushing it toward spots where it is still attached (H). If you get to a point where it is really stuck, try going from the other side. Patience and finesse are helpful, rather than brute force. Most come off easily once the removal process has been started.
After the old emblem has been removed, the area under the emblem should be cleaned (1). Anything with wax should be avoided. Roughness from the previous glue application will remain. If something other than the original emblem adhesive has been used, additional steps may be required to remove whatever is present, as excess residue could interfere with the new emblems.
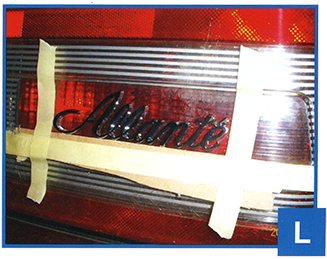
It is strongly recommended that alignment aids be temporarily added to the outer lens of the tail light when installing the new emblems (J). If the emblems are put on at an angle or off center, this will show. Although the double back tape provides much better adhesion, the one drawback is that you get one shot at placement. It has to be right the first time. Rather than placing it free hand, it's best to get some extra help by installing a guide right below the bottom surface of the emblem. With a straight guide on the bottom, and marks at both ends, it is easy to remove the protective covering from the tape, rest the bottom comer on the guide, check side to side location, then pivot the emblem onto it's final location on the outside of the lens. Once it has been properly placed (K), apply moderate pressure over the entire emblem so all the adhesive is in contact with the lens. (L ), then remove the guide materials.
One of the reasons letters sometimes broke off the original emblems was that the entire back of the emblem was not attached to the lens. It was only attached in spots. Cleaning rags and car wash brushes could snag the ends, and possibly break off small pieces. With complete attachment across the back surface, this type of damage will no longer be a problem with new emblems installed.


copyright © 2015 - Allantesource.com - all rights reserved